Live Demo
Try FastGateway in a free hosted sandbox. No cluster, no install, no sign-up.
demo.fastgateway.dev · username admin · password admin
The sandbox resets every 30 minutes, so treat anything you create as throwaway.
This walkthrough goes from an empty instance to a working domain and route. Follow the steps in order. It takes about ten minutes.
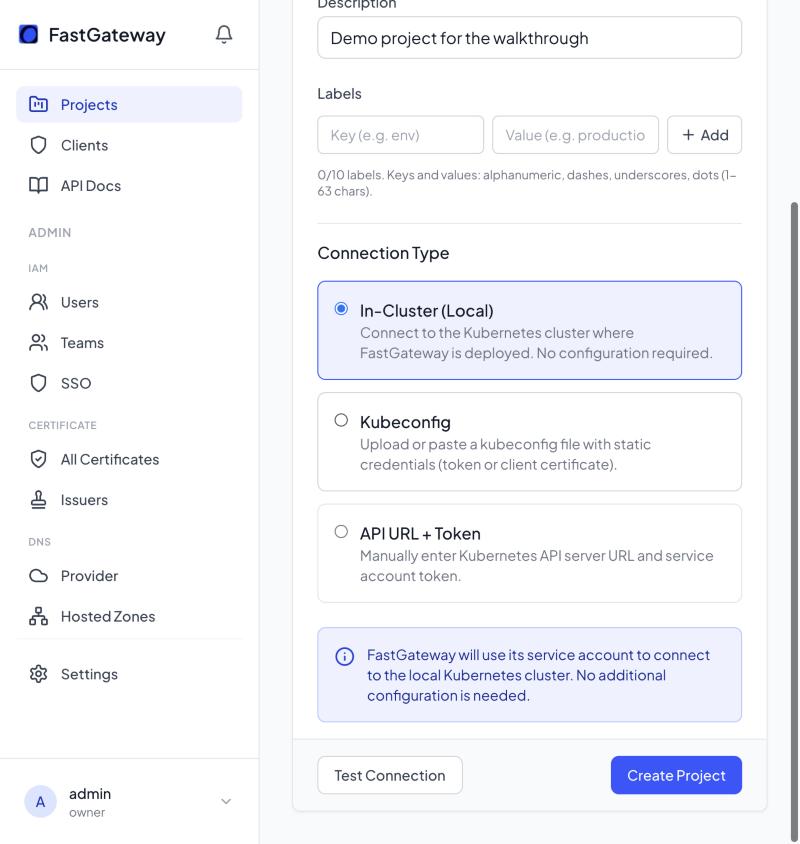
Onboard a project (in-cluster)
A project is where FastGateway provisions your Gateway, domains, and routes. The demo uses the cluster FastGateway runs in.
- Open Projects and click New Project.
- Enter a name like
demo. - Under Connection Type, pick In-Cluster (Local). Nothing else to configure.
- Click Create Project.
Create a team and user
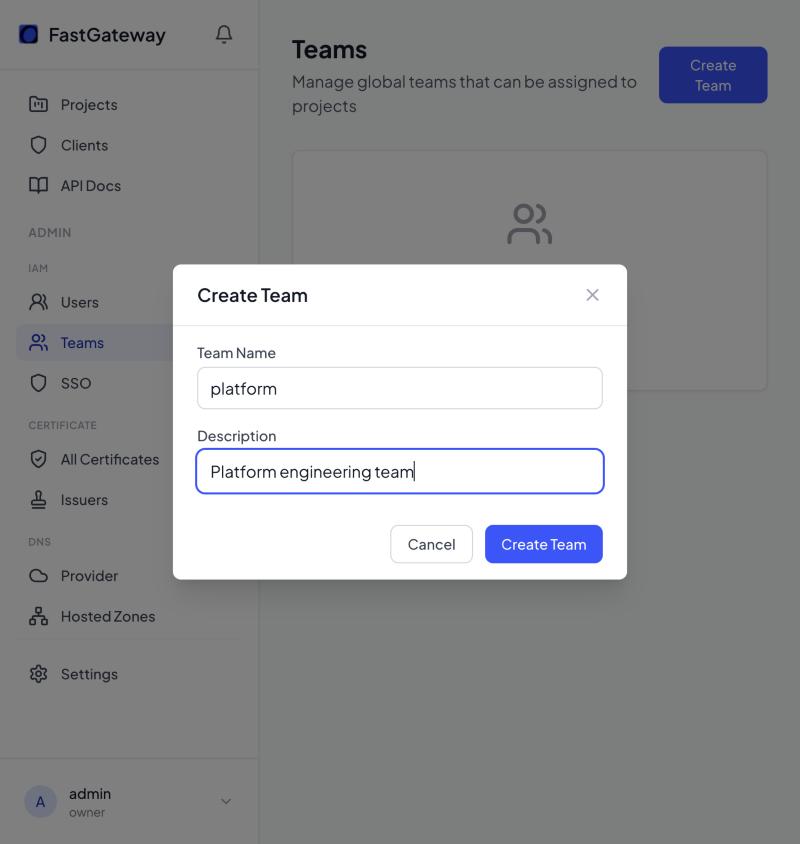
Teams own access to projects, and users belong to teams.
- Open Teams and click Create Team. Name it
platform. - Open Users and add a user with a username and password.
- Add the user to the
platformteam.
Create a self-signed issuer
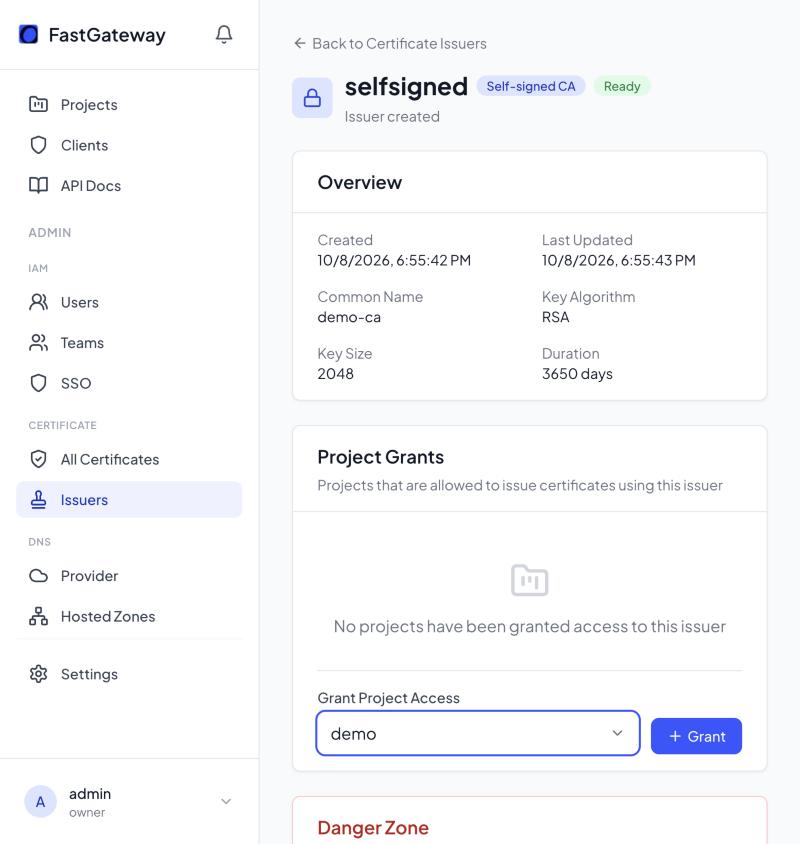
An issuer signs TLS certificates. A self-signed CA is enough for the demo.
- Open Issuers and click New Issuer.
- Keep the type Self-signed CA. Set a name like
selfsignedand a common name likedemo-ca, then click Create Issuer. - On the issuer page, under Grant Project Access, select
demoand click Grant.
Onboard the team to the project
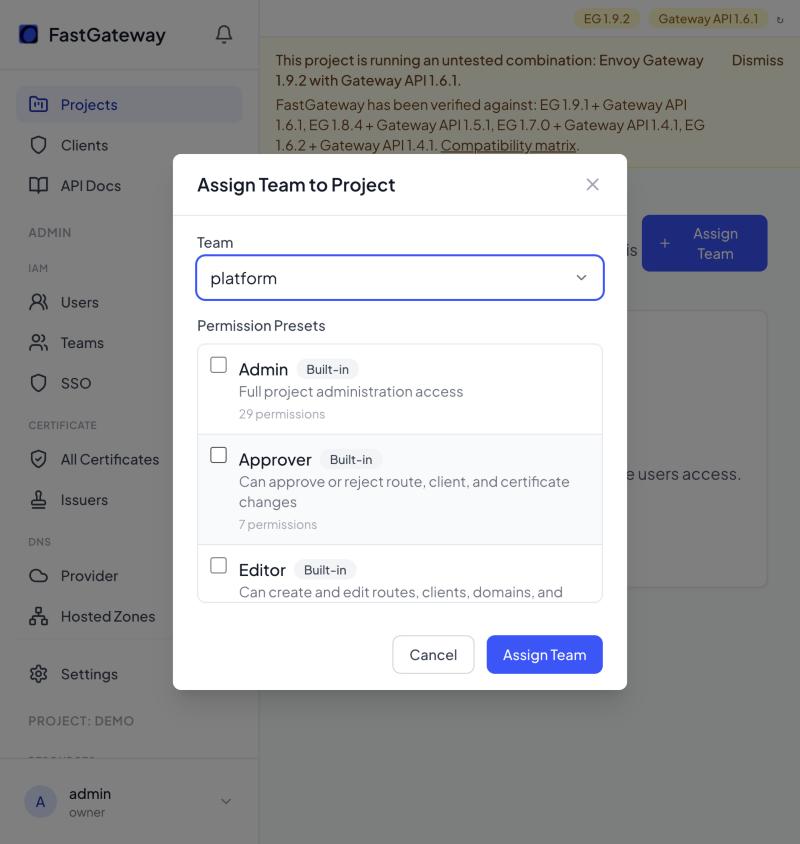
A team has to be assigned to a project before it can use it.
- Open the
demoproject and go to its Teams tab. - Click Assign Team and select
platform. - Pick a permission preset like Editor, then click Assign Team.
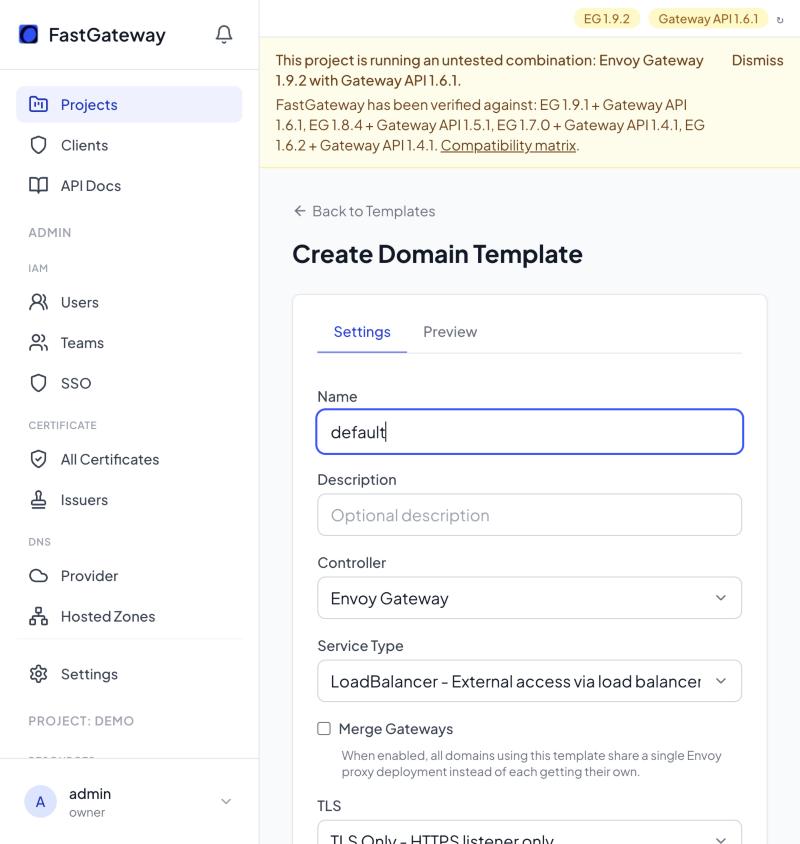
Create a domain template
A domain template holds the settings your domains share, so you set them once.
- In the
demoproject, open Domain Templates and click Create Template. - Give it a name like
default. - Pick a controller (Envoy Gateway), a service type (LoadBalancer), and a TLS mode (TLS Only).
- Click Create Template.
Set up the TLS certificate
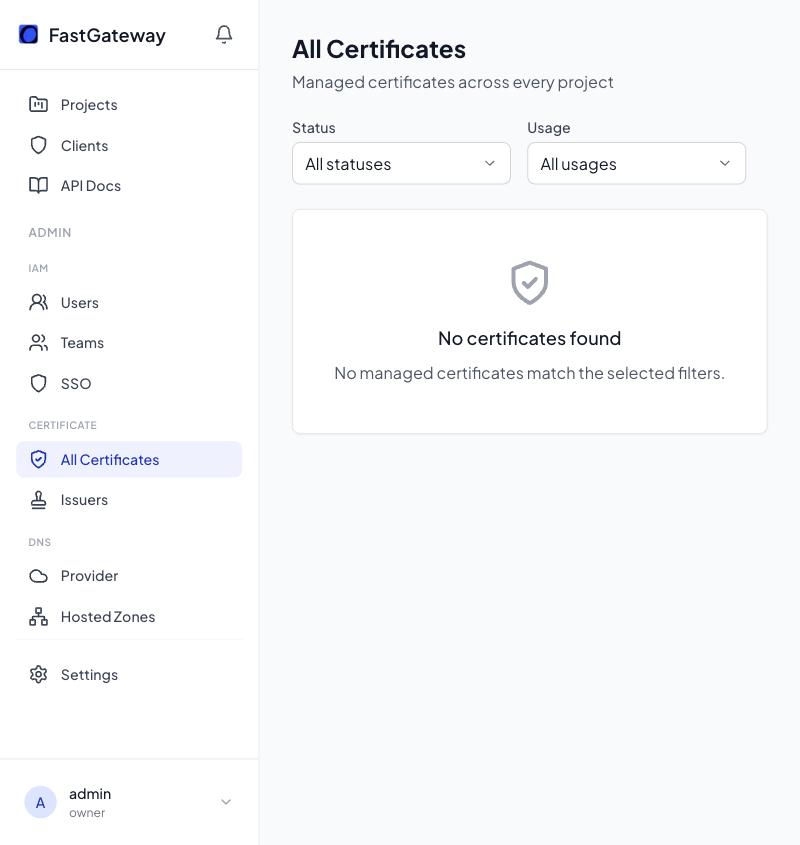
FastGateway secures HTTPS with a Kubernetes TLS secret, signed by the issuer you granted in step 3. There is no file to upload.
- Open All Certificates to see where issued certificates appear. It fills in as HTTPS domains come online.
- Choose a secret name for your domain, like
demo-tls. You reference it in the next step.
Create a domain
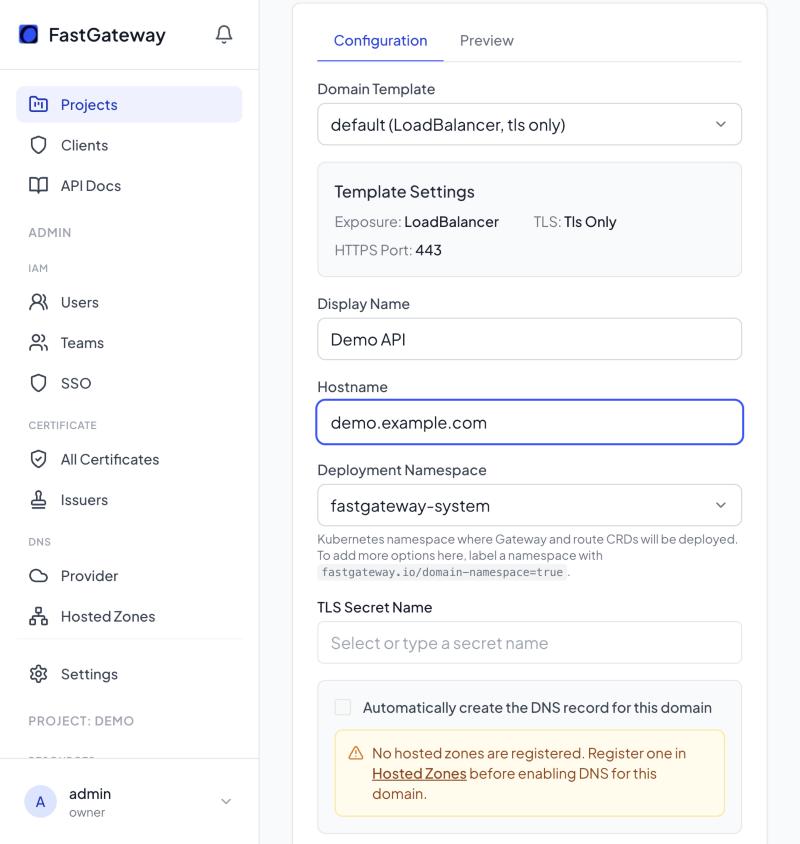
A domain ties a hostname to a template and a TLS secret.
- In the
demoproject, open Domains and click New Domain. - Choose the
defaulttemplate. - Enter a display name and a hostname like
demo.example.com. - Set the TLS Secret Name to
demo-tls. - Click Create Domain.
Create a route
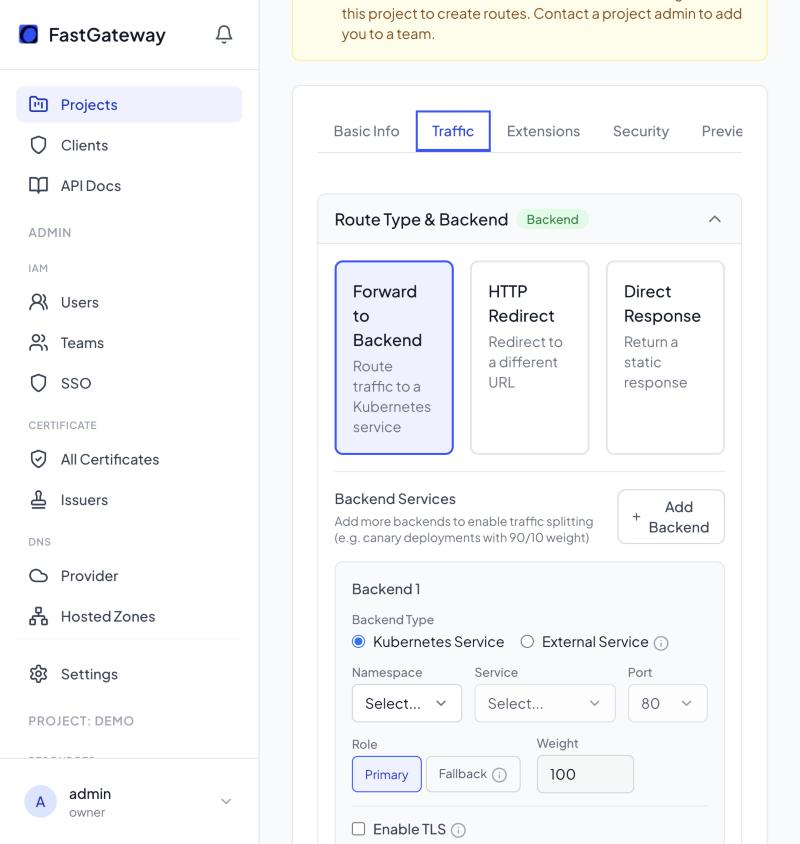
A route forwards matching traffic on your domain to a backend.
- Open your domain and click New Route.
- On Basic Info, name the route
demo-route. - On Traffic, keep Forward to Backend and add a backend service (namespace, service, port).
- Click Create. The change goes through approval, then your domain serves traffic.
What you built
You now have a full path from request to backend: a project, a team, an issuer, a domain template, a TLS secret, a domain, and a route. The same flow works on a real cluster. See Getting Started to run FastGateway yourself, or Concepts for how the pieces fit.